This video is an overview and an introduction to the latest model of the E-BikeKit display from Electric Bike Technologies. This display is new and introduced and available in August 2020 and it's also retro compatible back to the 2017 or previous models of the E-BikeKit display.
So, if you have a previous model, this model will actually serve as a replacement and upgrade to that display. We're going to walk through each of the functions, starting with the power on and off button, and work our way through all the menu settings to give you an overview of this display. So, we're going to jump right in here and we're going to turn the system off. You do that with the push pad, so on the left, you'll see the push pad. The push pad has a plus, a minus, a light icon, an eye icon, and then it also has the on and off icon.
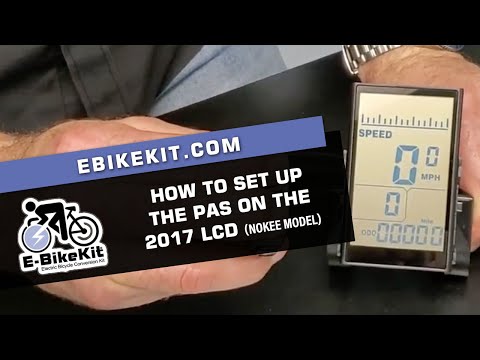
So, we're going to start by holding down on and off and that's going to turn the system off pretty standard stuff. We're going to press that with a quick press to get the system back on and you'll see the Electric Bike Technologies logo flash on the screen. Now, I'm going to go through each one of these here on the screen and show you what they do. I just hit the light button, so we can get the luminance up. There is an automatic sensor down here in this corner, that is sensing daylight or dusk and it will change the screen automatically. This light you can press at any time to do that manually as well. The E-BikeKit does not have a headlight option, so this is not for a headlight, you'll use it for the luminance changes. So, we have up here, we have the battery indicator right now showing 40% on the battery that's hooked up. We have the miles per hour here, and that would obviously change as you're riding around, and we have power. This here in this bottom, this on the power is actually going to show you current and a bar would show here as well when this is in use. We have trip over here on the left in the middle we have 0 through 5 and that's your power setting. Then we have the ODO which is the odometer and the total miles on the display which is 0 for this new one.
So, we'll go back to the push pad, and obviously one of the most important things we have here is how do you get into the settings. You have the plus and minus button you're going to hold those two down simultaneously for 2 seconds and that's going to get us into the user setting menu. The user setting menu is a series of settings and the way that you navigate this menu is you use the plus and minus to go through them and then to make your selection once you're on the setting that you want to change, you're going to use the "i" button right here. So, this "i" button on the push pad, if I push that, that's going to bring us over here and now you're going to use the plus and minus to make that change and this one the first one happens to be the Units which are Imperial, a USA or Metric for somebody outside of the US and UK and you're going to change the speed limit the wheel says you can actually see those changes you do that. So, for most of you, it's going to be in the United States and it's going to be Imperial of course. So, once you have the setting that you want, you're going to use the "i" button to select and then the focus is going to jump back to the setting and you're going to be able to use the plus and minus to navigate, you'll use the minus, in this case, to navigate down to Speed Limit. Now, the speed limit right now by default is going to be 20 miles per hour, that's how they're shipped. So, to make a change here, you're, going to again "i" button and then plus or minus. Now, this will go all the way up to a speed of 31 mph, that's not necessarily how fast your bike's going to go. How fast the top speed on your bike is ultimately going to be determined by the motor type, geared, or direct-drive it's going to be determined by that plus the outside diameter of the wheel or the wheel size and it's going to be determined by the voltage of your battery, in this case, it would be 36 volts or 48 volts which this LCD is compatible for. So, if you put it up to 31 it's going to go it's going to max out for your combination of your system and wheel size and battery type, not necessarily going 31 mph. So, again this will be set at 20, and depending on those factors, your wheel size, your battery voltage, and where you put your settings, some of our systems will go a top speed of 20 mph and some of our systems will go a top speed of 26 mph at the very, very highest end. So, we're going to put this down to 20 and again, if you wanted to limit this on the other side of that, if you wanted to limit this down, you can actually take this down to whatever it is if you had somebody riding the bike and you wanted it to top out at a certain speed, you can limit the top speed with this setting. So, I'm going to put this back to 20. I'm going to hit "i" and I'm going to move to the next one which is Wheel Size. I will hit "i" to get over there and we'll see by default it's 26 which would be the most common wheel size and it will go all the way down to 17. So, 16 is the smallest we have 16, 20, 24-inch, 26-inch, and 700c those are the options for your wheel sizes and it's important that you get it right because this will determine your mph calculation on the front end of this LCD. So, I'm going to put that back to 26, I will press "i" and then I will move to the next setting which is Motor Type. Now motor type, E-BikeKit sells two types of motors, one of them is a fat motor but essentially 2 types of motors 500 watts geared that's the default on this LCD, and that is what we call performance. So, that is a smaller diameter performance geared motor and that's 500 watt nominal motor. We're going to click the "i" to get on this setting and I'll show you that there are only two options here, it's 500 watts geared, and the other setting is going to be 500 watt direct-drive. We call that heavy-duty (HD) and that's the larger diameter, shiny motor that we have with the logo on the side cover, hopefully you know which motor you have, again important that you program this the right way. So, we'll click geared motor I'm going to hit "i" to go back, and we'll go to the next setting which is Battery. Battery in this case 48 volt lithium-ion is the default. That's the most common battery that people use with an E-BikeKit. So, we'll click "i" and get over to the options, and I'll scroll through we're going to go down here, we'll start with the, we'll go down, and it's DIY. DIY is a much more complicated setting. It's the most complicated, many people are not going to use it, so it's very rare that you would use this, but if I click on DIY, you can see a menu of the 5 settings. These 5 settings are actually going to be the 2 increments from full to empty and they're going to be different voltages and if you know the discharge curve of your battery, then you would actually be able to come in here and change some of these settings that would have an effect on the front-end battery indicator. So, it's a custom option that we allow you to go in here and make your own custom options on the battery discharge curve if you have that information. Most people do not and again this is going to be very rare, so I'm going to get out of that I'm going to go back to the settings and show you what's next there is a 36 volt SLA which is sealed lead acid. Many people don't use this, but some people still use this and so we left it in. We have customers in the past that use this, so we left that in there 3 volt SLA, 48 volt SLA, 36 volt lithium-ion, and 48 volt lithium-ion. Most people after 2020 it's going to be a 48 volt lithium-ion, okay. So, I'm going to press "i" to get back, and we'll go to the next setting, which is the Current Limit. Now, the E-BikeKit has a 20 amp controller and that's pretty standard for legal e-bikes in the United States and so 20 amp is where it ships now. If I click on this, I cannot go anywhere past 20 amps, but I can go lower and what this would do is ultimately, it would lower the amps allowed to pass through the system and basically overall as it's a power setting and you could pretty much blanket, bring down the ultimate power of the entire system by bringing this down. So, 99% of you, you don't want to play with this 20 amp is where it should be in some examples where you really wanted to reduce power overall for everything else, you could limit the amount of current that would go into the controller and ultimately that's kind of a blanket power setting across the board. So for 99%, leave this at 20. I'm going to click the "i" and get back I'm going to go through the next one, which is the Pedal-Assist setting, and this gets a little bit more complicated, but I'm going to click "i" to get in here now. Here we have 3 settings, we have PAS Delay, the PAS Delay is how many times, how many magnets pass on the crank sensor and the crank disc with magnets in it. It's how many magnets are going to pass until the pedal-assist actuates or kicks in, but then we have the PAS Power, and that's by default that's 3, power is going to be 5 and pedal-assist sensitivity is going to be 12 out of the box. I recommend you don't change these initially, but you can get in there and start to play with them very easily and find out and really fine-tune the pedal-assist on this system, which is it's a great feature, but it's going to take some tinkering on your part to find what's best for you. We've put in what's most universal for most people and a lot of people you don't have to get in here and change this, but Pedal-Assist Delay is one that's how quickly the system will kick in based on your cadence and how fast (oh, it kick me out of settings) I'm going to up and down plus and minus together to get back in. Again, go down to PAS, and press "i" so we just timed out there, so I'm going to leave the delay where it is I'm going to go down to PAS Power now. This is really like the torque of, and how quickly once that pedal-assist kicks in how much it gets up to help you out right to assist with your pedaling so you have the power, and then you have the pas sensitivity, and this is also a bit of a power setting, and it's so we have the pedal-assist power in the middle which is kind of like torque, and then the pedal-assist sensitivity is ultimately a larger kind of blanket power setting, and again you can play with each one of these and get the feel and really fine tune to your riding situation and how you want your pedal-assist to go between all these numbers and the power setting on the front of this LCD. There's a lot you can do here, there are a lot of nuances, and you can really dial this LCD in which is a great feature. So, I'm going to get out of here I'm going to use back and "i" and I'm going to get to the next setting now, this next setting says Drive right here. Now the drive setting and its default is P/T Override and what that means is pedal-assist is always on, and then you have throttled the "T" override. So, when you're riding you're going to have pedal-assist, and that's going to be on it's going to be looking at your pedal-assist settings and your power setting from the front, but anytime you grab the throttle this setting here, this drive mode means pedal-assist, you grab the throttle you actuate that, and that's going to take over, so it's going to override the pedal-assist. So, if you had pedal-assist on, you're going along, and you have a situation where you need to just go, you're going to grab that throttle and actuate and go, and it's the throttle is always going to pay attention to it's always going to be full power, okay. So, you grab the throttle, it's full power over the pedal-assist no matter what level or other settings you're on. Now I'm going to click "i" to get into there, and I'm going to click the minus, and that's going to take me, and that's going to say throttle only. Obviously, if it's throttle only, the throttle will work, and the pedal-assist will be not responsive and then pedal-assist only. So, you can choose those pedal-assist only or throttle only from this feature right here. Also physically, if you did not connect one or the other, it would be by default one or the other. I hope that makes sense, so I'm going to put this back to pedal-assist with throttle override and move on. I will click "i" and get back down here to LCD Luminance this should be obvious. You know I will click "i" and show you that we can make it darker hopefully, you can see that, and then we'll go all the way back up to 100% click "i" and get back. Now finally, we hit minus we go to Trip Reset and we can click yes when we hit "i" it will say cleared, and that's how you clear your trip.
So, we'll go down to back, and we'll click "i" and that's going to get us back to the main screen. So, I hope that makes sense now, what we haven't talked about here is most obvious. Now, if you have the plus and the minus here, I want you to think about this one, we'll go down hit minus to 0 okay, and then it's 0, 1, 2, 3, 4, 5. These are top levels of power, okay, and I want you to think about this as 20, 40, 60, 80, 100% of power okay, and so when you need to go you can do this on the fly you can do it when you're standing still it doesn't matter but you're going to use the plus and minus when you're riding, and you want to access power to go through 0 through 5, okay and 5 would be the highest and again, I want to reiterate something in this with this LCD. If you have it in, let's say 3, and you're in pedal-assist with throttle override, your pedal-assist is going to be paying attention to this overall 3, okay, but it's also when you grab the throttle, it's always going to be full power it's not going to pay attention to this, and that's kind of an upgrade and a new feature for this LCD.
Okay at this time I'm going to tell you just a couple of more things here what's different about this I think I've already mentioned that this is retro compatible with the 2017 or you know the previous model of this LCD, which was a black and white LCD. You can upgrade and use this LCD in its place if you need to get a replacement okay. The plugs are the same the settings are all correlated, so it is retro compatible that's a big deal. Another thing that differs between this model and the new model, and the 2017 or previous model is that this has a memory. So, if I cycle, will you see the 3 here in the previous model this will go back to 0 but when I cycle on and off in this situation, it does remember the 3, so we have added that feature so if you're a person who likes to ride in 3, 4, 5 whatever it may be it's going to come back on where you left off and lastly I'm going to show you, on the side of this, you do have the USB port. This is a standard USB port, and that's a 5 volt, so you can charge your mobile devices off of that port.
So, that is the latest model LCD for the E-BikeKit conversion system from Electric Bike Technologies, I hope you find it useful. If you have any questions whatsoever call our toll-free number, 866-882-3245, or click contact on this site and use the form to get in touch with us, and we'll take care of you. Thank you.